
Kendo DataSource and Azure Mobile Services.
The DataSource is one of the most powerful framework components of Kendo UI. It is the best way to get data in and out of the many widgets that the Kendo suite offers. The Kendo team has done a great job at explaining how to get started using it, deep diving into it, and integrating it with Web Api and EntityFramework, Backbone JS, Breeze JS, among others.
On this blog post I will explain how you can use a Windows Azure Mobile Services (ZUMO) back-end in conjunction with the Kendo DataSource.
What is this ZUMO thing anyway?
Windows Azure Mobile Services is a a Backend as a service, similar to Facebook’s Parse or Telerik’s Everlive. It allows you to quickly build a JSON based REST API with easy to configure social network authentication, cloud code editing, full control of HTTP request-response interactions, and custom API endpoints. On top of that Microsoft provides SDKs to interact with your ZUMO REST API in C# (.NET and Xamarin apps), Java (Android), Objective-C (iOS) as well as a newly released JavaScript SDK for Web apps
The JavaScript SDK is what we can use to enable our Kendo DataSource to work with our ZUMO back-end.
OK. Let’s get started.
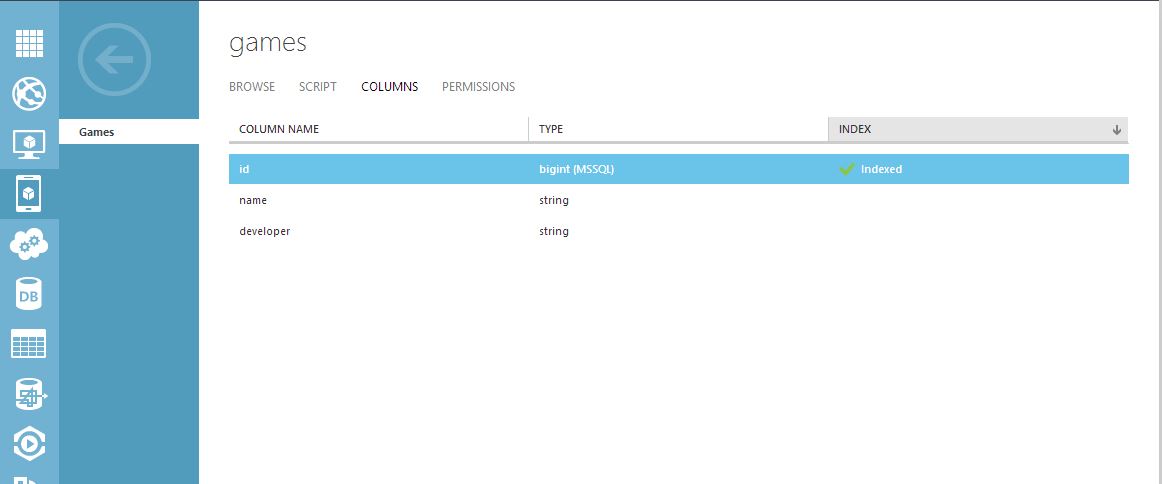
Evidently, the first thing that needs to be done is to go to the Windows Azure Portal and create a new Mobile Service. The Wizard will ask if you want to use an existing Azure Database or if you want to create a new one. After this you can create a new table. Azure will proceed to create the SQL table and the RESTful JSON endpoint for it.
I will start by creating a simple Games table with three columns. Id, Name and Developer.
On to the code.
Firstly, make sure to place the necessary scripts on our HTML page to use Kendo UI and the ZUMO JavaScript SDK.
<script src="http://code.jquery.com/jquery-1.9.1.min.js"></script>
<script src="http://cdn.kendostatic.com/2013.3.1324/js/kendo.all.min.js"></script>
<script src="https://yourzumoname.azure-mobile.net/client/MobileServices.Web-1.0.0.min.js"></script>
I will use a Kendo UI Grid as example, but theoretically the DataSource can be used with many different Kendo components. Lets start by setting up a simple Video Games Kendo Grid that supports pagination, editing, inserting and deleting.
$("#grid").kendoGrid({
    pageable: true,
    dataSource: dataSource,
    columns: [
        "name",
        "developer", {
        command: [{
            name: "edit",
            text: "Edit"
        }, {
            name: "destroy",
            text: "Delete"
        }]
    }],
    toolbar: [{
        name: "create"
    }],
    editable: "inline"
});
The Kendo Grid itself is very easy to set-up. Most of the configuration necessary to work with the back-end will reside on the dataSource property.
If we want to write as little code as possible to get this grid working we simply need to make use of the ZUMO SDK and override the transport methods on the Kendo DataSource
var client = new WindowsAzure.MobileServiceClient("https:///*your ZUMO service name here*/.azure-mobile.net/", "/*Your API KEY here*/");
var table = client.getTable("games");
var dataSource = new kendo.data.DataSource({
    transport: {
        read: function (options) {
            table.includeTotalCount() //necessary for grid to paginate
                 .read()
                 .done(options.success);
        },
        update: function (options) {
            table.update(options.data)
                 .done(options.success);
        },
        create: function (options) {
            var item = options.data;
            delete item.id; //ZUMO doesnt allow you to set your own ID. It gets auto generated.
            table.insert(item)
                 .done(options.success);
        },
        destroy: function (options) {
            table.del(options.data)
                 .done(options.success);
        }
    },
    pageSize: 10,
    schema: {
        total: "totalCount",
        model: {
            id: "id",
            fields: {
                id: { type: "number" },
                name: { type: "string" },
                developer: { type: "string" },
            }
        }
    }
});
That’s it!. We now have a Video Games Grid that loads data from our ZUMO back-end and supports all CRUD operations.
Not so fast
One caveat with this approach, though, is that the paging will be done client-side. This means that all data will be loaded on one HTTP request, which might not be ideal.
In order to add server side paging we will have to use the take and skip methods on our MobileServiceTable to pass the page and pageSize to the server so that it can respond with the limited result-set that we are looking for.
var dataSource = new kendo.data.DataSource({
	transport: {
	    read: function (options) {
	        table.skip(options.data.skip)
	             .take(options.data.take)
	             .includeTotalCount()
	             .read()
	             .done(options.success);
	    },
	    update: function (options) {
	        table.update(options.data)
	             .done(options.success);
	    },
	    create: function (options) {
	        var item = options.data;
	        delete item.id;
	        table.insert(item)
	             .done(options.success);
	    },
	    destroy: function (options) {
	        table.del(options.data)
	             .done(options.success);
	    }
	},
	serverPaging: true,
	pageSize: 10,
	schema: {
	    total: "totalCount",
	    model: {
	        id: "id",
	        fields: {
	            id: { type: "number" },
	            name: { type: "string" },
	            developer: { type: "string" },
	        }
	    }
	}
});
Now the server will receive the pagination requirements (underlyingly using OData) and only retrieve the necessary items from the Azure database.
There are many more functionalities that are possible when using a Kendo DataSource along with an Azure Mobile Services back-end. This will hopefully give you a good idea of how to get started and where to go from here.